Notice: We marked this feature as deprecated. This means we no longer recommend that our users use it.
The Constant Contact integration module allows you to send contact data collected through your contact forms to the Constant Contact API. You can create reliable email subscription services in a few easy steps.
You need a Constant Contact user account to use this integration. If you don’t have an account yet, sign up to create an account before proceeding.
Connecting to the API
This integration module utilizes the Constant Contact V3 API. To start using the API from your WordPress website, you first need to register an application to get an API key and an app secret that you will use later.
To register an application, move to the My Applications page on app.constantcontact.com and click the New Application button in the top right.
You’ll get asked for the application name. You can change the name anytime, so let’s name it “Contact Form 7 Integration for (your site title)” for now.
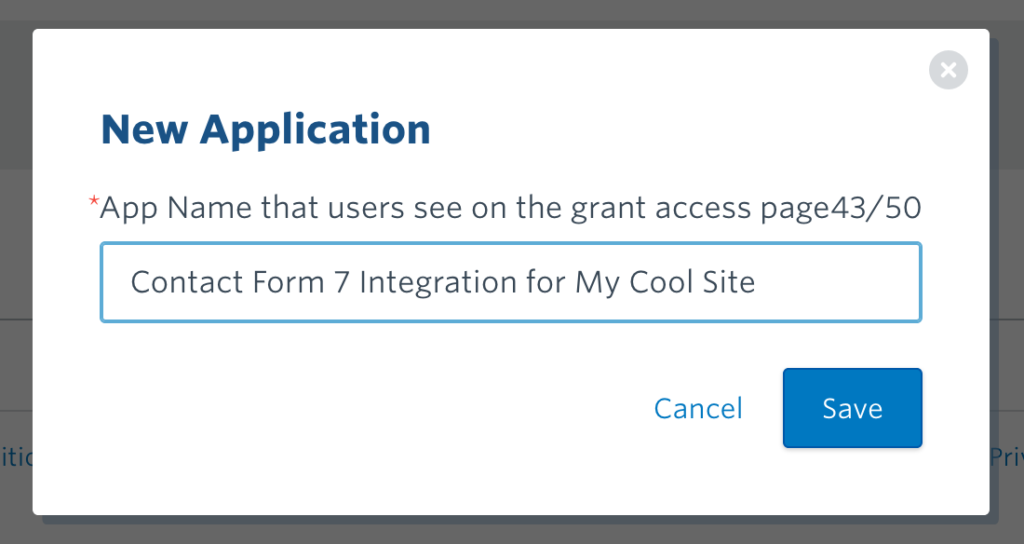
Click Save, then you’ll be directed to the Details page.
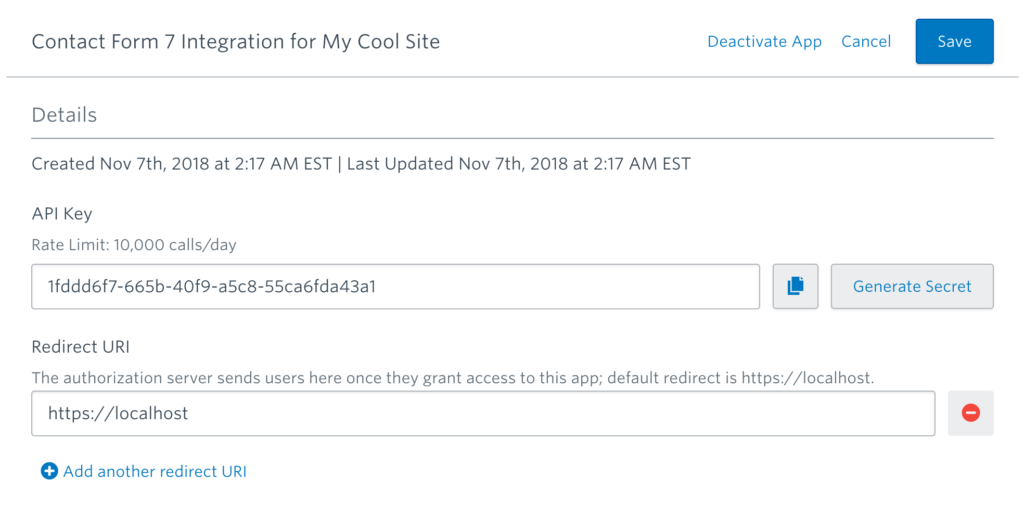
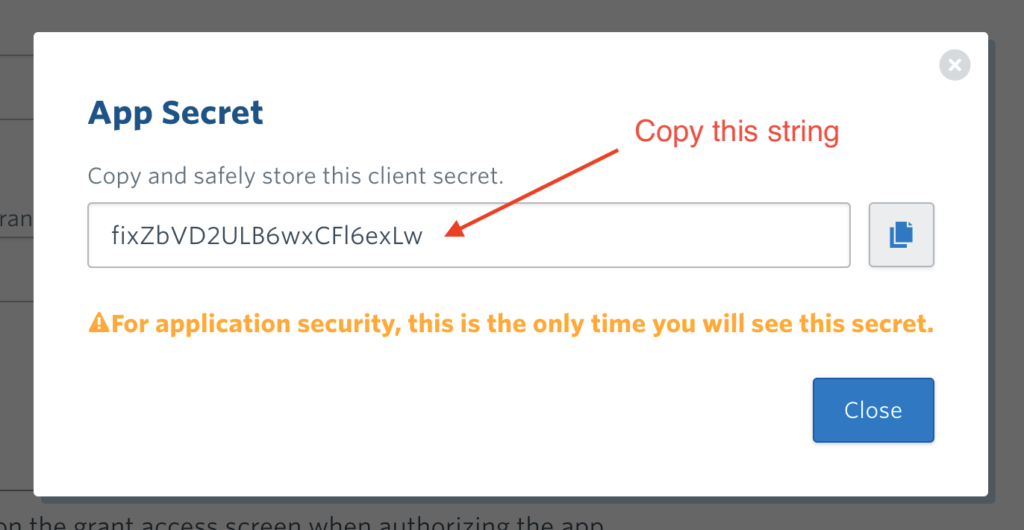
On the Details page you will find the API Key in the first field. Click the Generate Secret button next to the API Key field to generate an app secret. Copy the API key and app secret as you will use them in the next step.
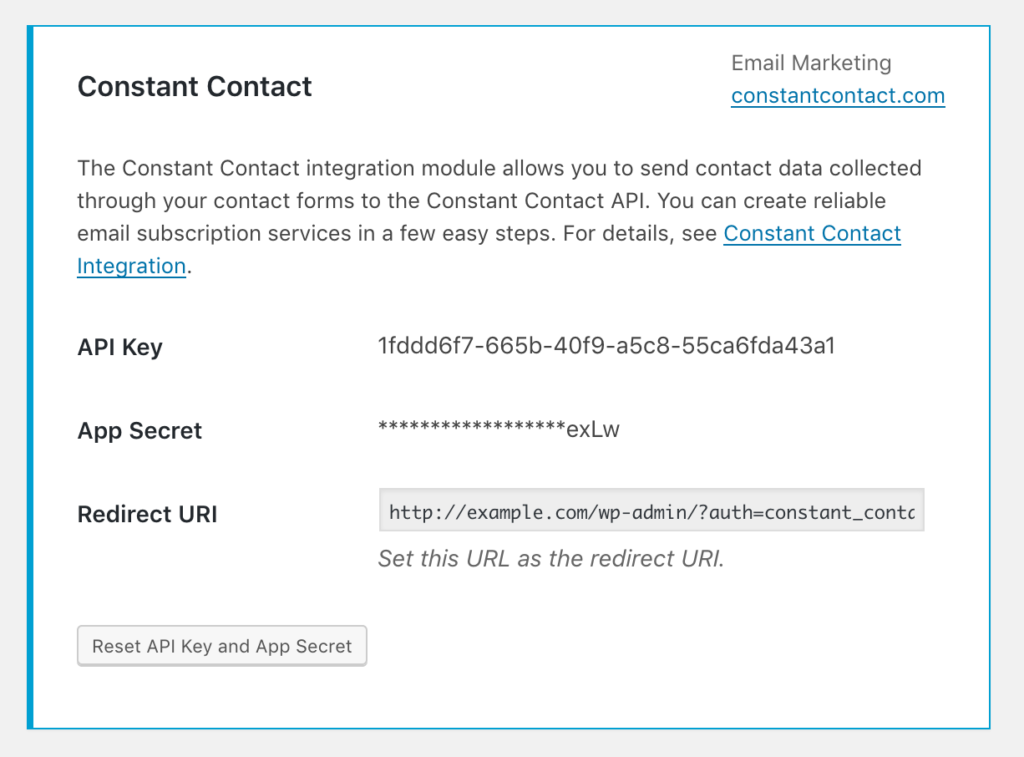
Next, open the admin screen of your WordPress website in another tab of your browser. Move to the Contact > Integration menu page and find a box titled Constant Contact.
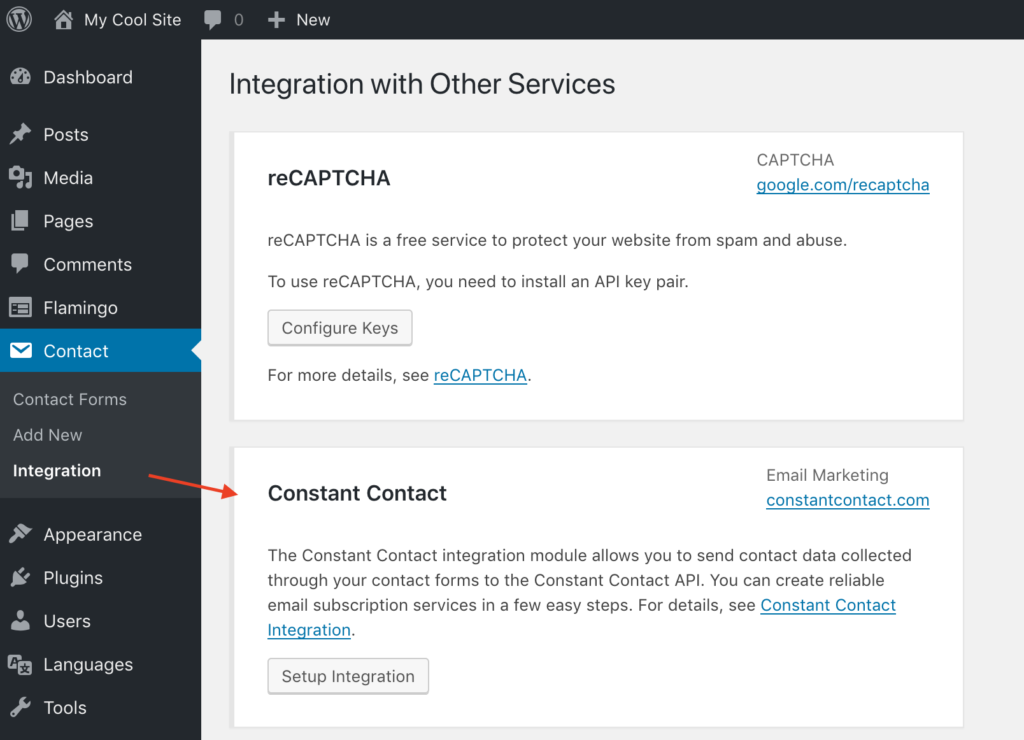
Click the Setup Integration button; it will display some input fields. Paste the strings you have copied in the previous step into the API Key and App Secret fields.
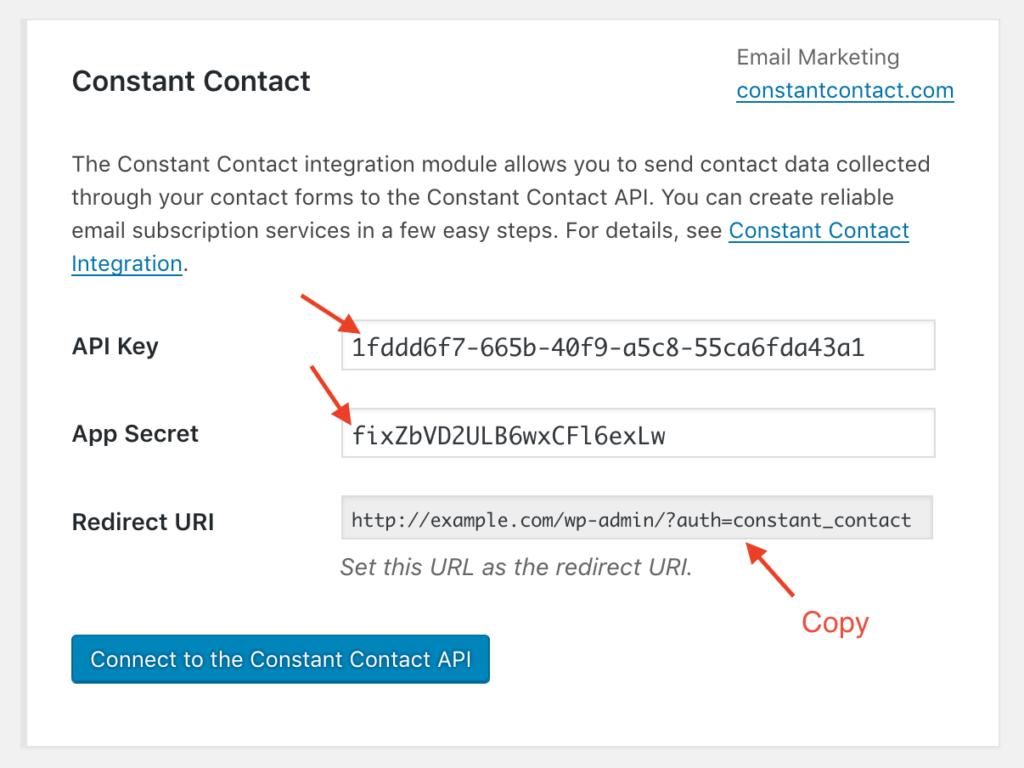
You’ll find the Redirect URI read-only field under the two fields. Copy this field value and paste it into the Redirect URI field on the Details page on app.constantcontact.com.
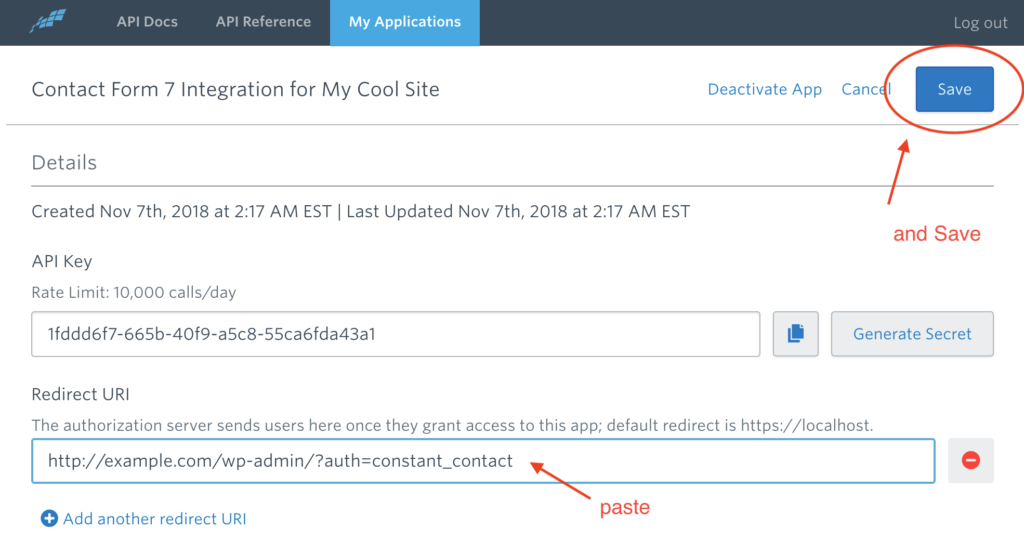
Once you change the field value on the Details page, click the Save button on the top right.
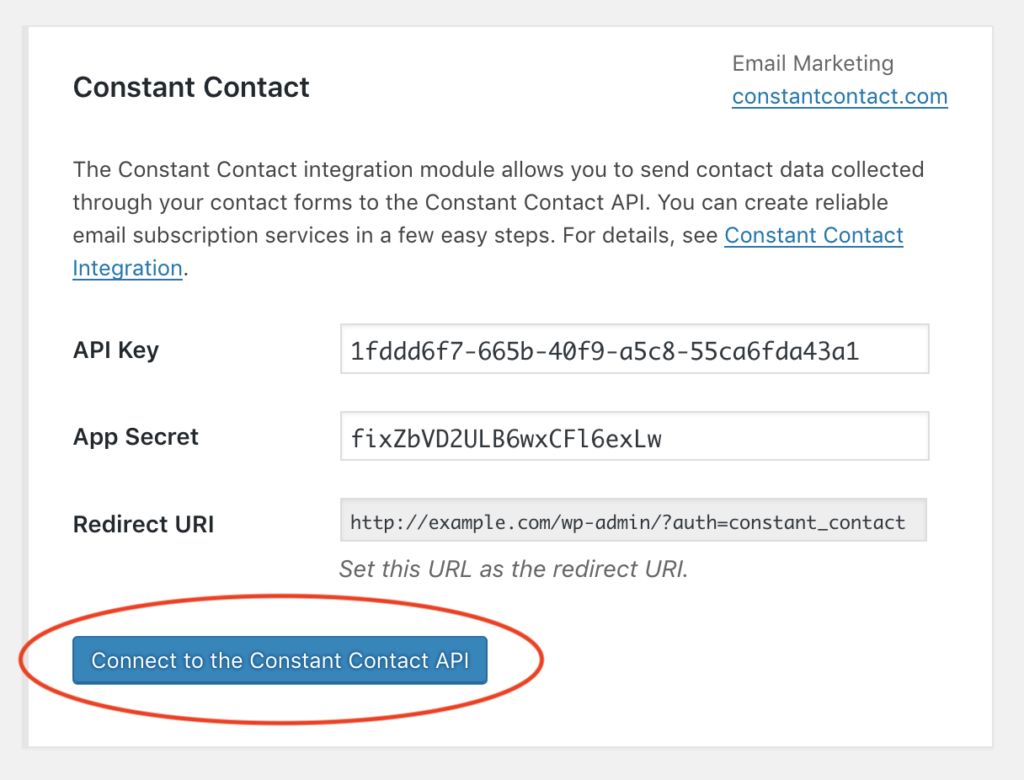
Now, you have almost completed the necessary set-ups. Move back to the Contact > Integration menu page in the WordPress admin screen and click on the Connect to the Constant Contact API button to start the authorization process.
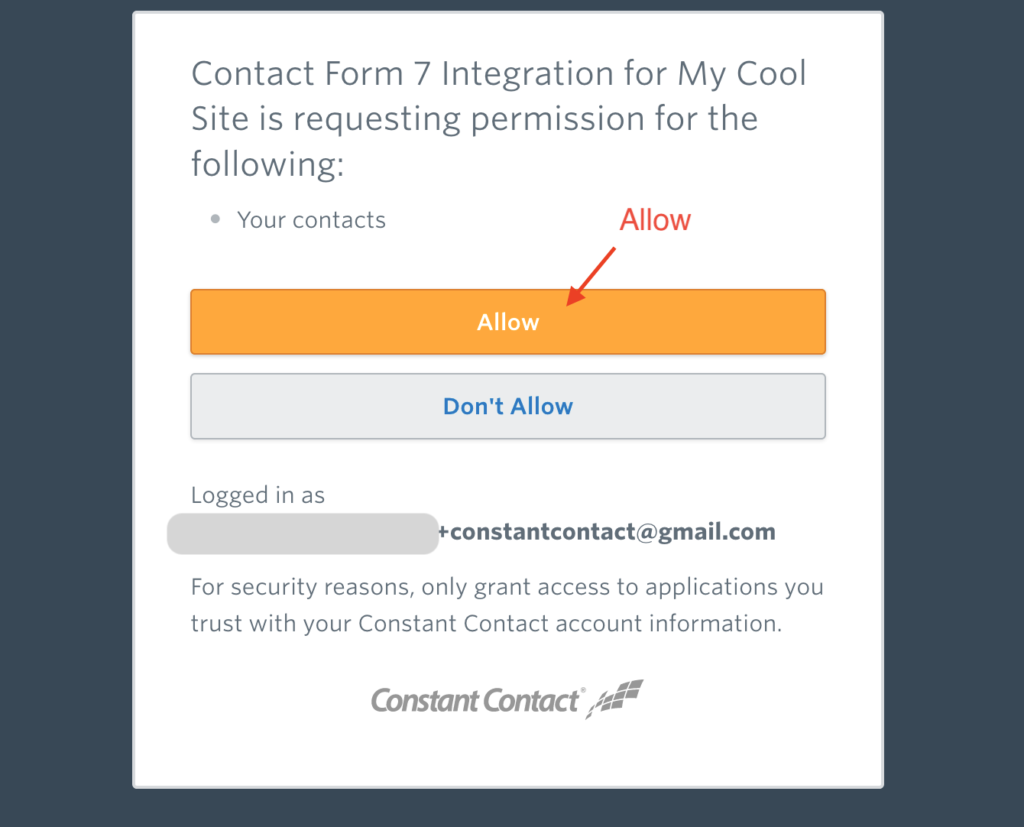
If you have set it all up correctly, you’ll get directed to the Constant Contact log-in page (if you are not logged-in yet) and will be asked to authorize the application you’ve registered to access your Constant Contact account.
After that, you will be redirected back to WordPress and find that the border color of the box has changed to blue. The blue border indicates that the connection to the API has been created successfully.
Contact properties mapping
Now, your contact forms and the Constant Contact API are connected.
Every time a valid form submission is received, Contact Form 7 will send a request to the Constant Contact API that Constant Contact add the contact data to its database based on the submission.
Constant Contact’s contact data is composed of different types of properties, such as first name, last name, email address, phone number, job title, birthday, etc. To build a request to the API, Contact Form 7 needs to know which input field of the contact form corresponds to which property of Constant Contact’s contact data.
Contact Form 7 uses the following name-based mapping table to determine the correspondence between input field and contact property. For example, if there is [email* your-email] form-tag (name: your-email) in the form, the value through the field will be used for the email_address property of a contact.
| Form Field Name | Contact Property |
|---|---|
your-first-name | first_name |
your-last-name | last_name |
your-name | first_name and last_name (*1) |
your-email | email_address |
your-job-title | job_title |
your-company-name | company_name |
your-birthday-month | birthday_month |
your-birthday-day | birthday_day |
your-birthday | birthday_month and birthday_day (*2) |
your-anniversary | anniversary |
your-phone-number | phone_numbers |
your-address-street | street_addresses.street |
your-address-city | street_addresses.city |
your-address-state | street_addresses.state |
your-address-postal-code | street_addresses.postal_code |
your-address-country | street_addresses.country |
*1 — If there is no your-first-name or your-last-name field in the form but there is a your-name field instead, the first word of the your-name field value will be used for the first_name contact property and the remainder will be used for the last_name property.
*2 — If there are not both the your-birthday-month and your-birthday-day fields in the form, but there is a your-birthday field with a date value in YYYY-MM-DD format, the month and day parts of the value will be used for the birthday_month and birthday_day contact properties respectively.
There may be cases where you don’t feel this mapping fits your actual form fields. For such cases, Contact Form 7 provides the wpcf7_constant_contact_contact_post_request_builder filter hook. While it requires a bit of PHP coding to make a filter function, you can customize anything and everything in a contact creating request with this filter.
Obtaining consent
It is strongly recommended that you obtain clear consent from the contact form submitter before adding their contact data to the subscription list. This is not only because collecting and using personal data without consent is illegal. It is also because delivering email to unintended receivers leads to a high spam complaint rate.
For form fields that check submitters’ consent for adding their contact data to Constant Contact subscription list, Contact Form 7 provides the consent_for:constant_contact form-tag option. You can use the option like in the following example:
[acceptance your-consent optional consent_for:constant_contact]
Add me to Constant Contact subscription list.
[/acceptance]
If you have this form-tag (acceptance checkbox) in your contact form, Contact Form 7 sends the contact data to the Constant Contact API only when the submitter has selected the checkbox to confirm their consent.
You can also use double opt-in, and there are two options to do it:
- Use Constant Contact’s native Confirm Opt-In to List feature, or
- Install and activate another WordPress plugin called Double Opt-In Helper.
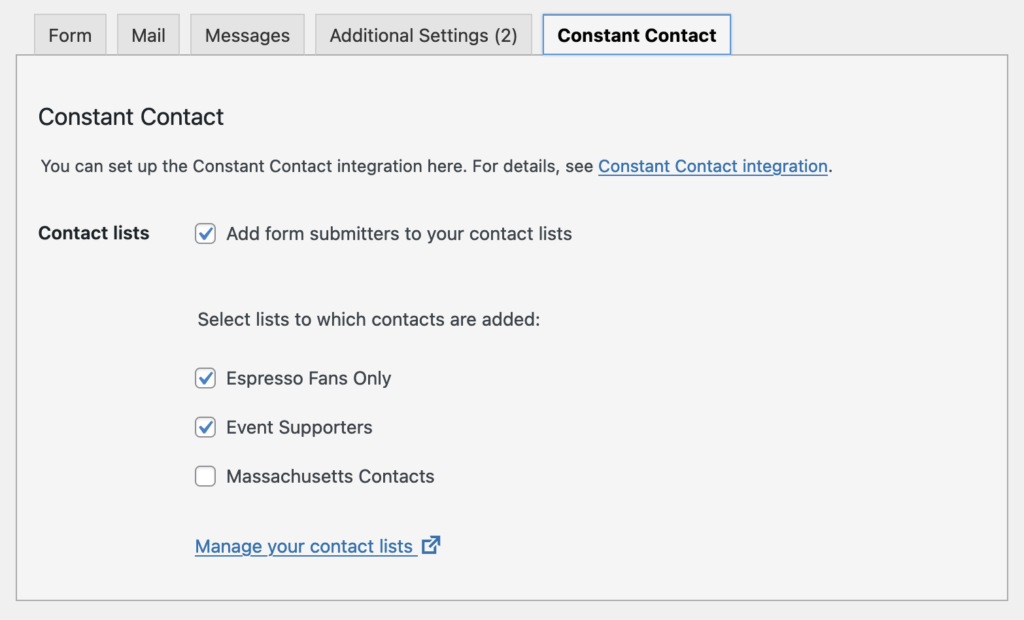
Specifying contact lists
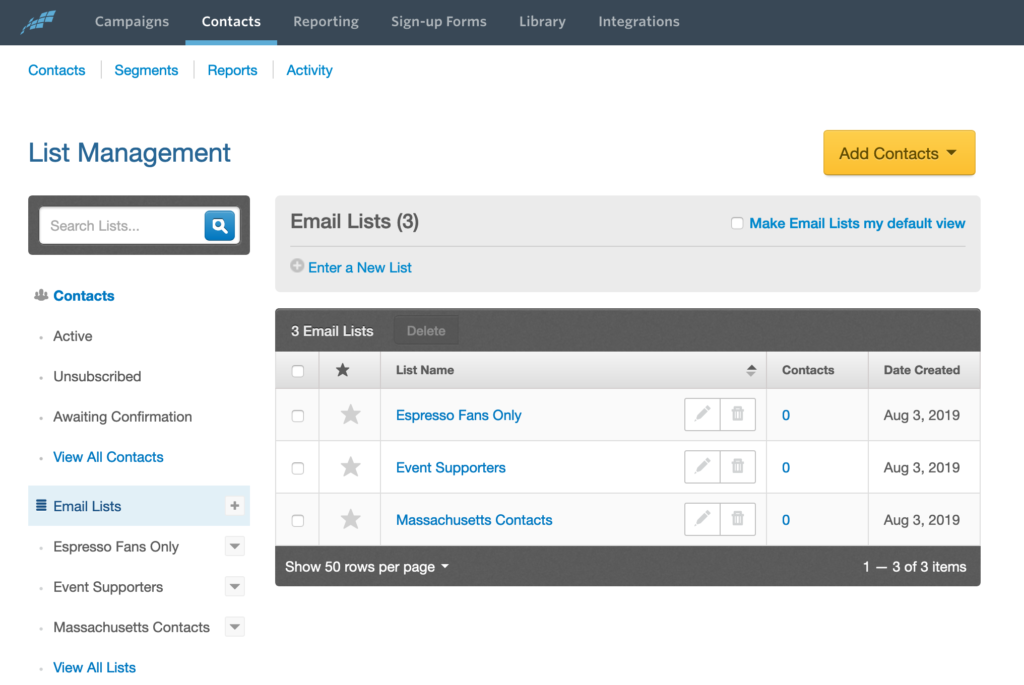
Constant Contact allows you to group contact data you have collected into contact lists (also called “email lists” or just “lists”).
Contact Form 7’s Constant Contact Integration supports specifying contact lists for new contacts collected through your contact forms.
If you have no contact lists yet, go to the Constant Contact dashboard and try creating your first list. Then, come back to the WordPress admin screen. In the contact form editor screen, you’ll find the Constant Contact tab panel added there. In this tab panel, select the Contact lists checkbox if you want to add new contacts through this contact form to your contact lists, and select the contact lists.